Each part of the empenage seems to add a new complexity to the build. The Rudder is no exception. It does not have internal ribs like the Horizontal Stabilizer; rather it has light weight stiffeners that the builder fabricates from pre-punched angle channel stock. Tho lighter in weight than the Vertical Stabilizer the Rudder has many many more rivets.
12/05/14
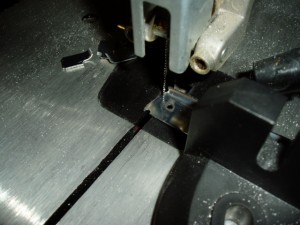
Not the best photo, but it shows a pre-punched rudder stiffener being cut on our band saw.
There are sixteen stiffeners.
12/07/14
Unlike the Stabilizer Skins that are one piece of aluminum sheets that have been folded at the leading edges, the Rudder skins are two flat sheets. The stiffeners and skins are match drilled. The drill bit is run through the parts and clecos are inserted to hold everything flat to the table. Of course match drilling is always followed by deburring the holes.
12/08/14
This photo shows our Avery dimpling tool. A hammer strike dimples the hole making them ready to hold a flush rivet.
The Avery tool is simpler and less expensive than it’s competitor, the Brown DRDT that is favored by many. I like the Avery as it seems more versatile for positioning large pieces such as the Horizontal and Vertical Stabilizer skins.
The dimpled stiffeners are then prime painted and back riveted to the skins. So far so good.
12/09/14
The flanges of the Rudder tip and bottom ribs are very close together near their trailing edges; too close to accommodate a squeezed female dimple die. The setup to the left shows a steel bar that has been machine countersunk to receive a male dimple die that is mounted in a second steel bar above the rib flange. A manual squeezer then presses the two bars toward each other, dimpling the flange.
Unlike the ribs of the Horizontal and Vertical Stabilizers, the Rudder top and bottom ribs needed considerable fluting to remove curvature from their webs.
12/10/14
As an active control surface, the Rudder requires a heavy lead weight forward of the vertical hinge line. This gives the Rudder aerodynamic stability and avoids destructive flutter. The weight is contained in a box like structure shown cleco’d for match drilling at the top of the Rudder spar.
12/11/14
The right and left Rudder skins will be riveted at the trailing edge on each side of a wedge strip having a triangular cross section. Holes in the wedge strip are machine countersunk to receive the skin dimples. I followed hints by other builders on how to do the countersinking. Place the countersink cutter in a microstop drill guide and manually press the wedge to the guide. The countersink is formed perfectly perpendicular to the wedge surface.
12/12/14 – 12/14/14
- Primed spar and other parts.
- Clecoed parts ready for riveting
12/15/14
The base of the Rudder spar is riveted to a steering bar that is reinforced by the plate with the large hole shown to the left. The shop heads of the four rivets in the photo cannot be reached by a typical bucking bar. I used a 3/8″ bolt and thirteen washers to provide the mass necessary to form good shop heads.
12/16/14
Installed the lead counterweight and riveted the counterweight structure.
12/17/14
The Rudder skins overlap the skin of the counterweight box. In order to create an aerodynamic and cosmetic pleasing transition, both the counterbalance skin and the Rudder skin are filed to a sharp edge in the overlap area. It is a relatively easy task. After priming, the transition is nearly invisible.
12/18/14
To form a virtually straight trailing edge, Vans recommends gluing the two skins and the wedge strip together before riveting. The glued edge is clecoed to a metal angle and set aside several days until the glue cures. We taped cling-wrap over a pre-drilled aluminum angle and used a small amount of fuel tank bonding agent sold by Vans.
12/21/14
The bonded trailing edge ready for riveting. Riveting done and we are very pleased with the results.
12/22/14
Finished setting the last rivets on the aft ends of the tip and bottom ribs
12/23/14
Rolling the leading edge
The leading edge of the Rudder snuggles in behind the Vertical Stabilizer and is connected to it by three bearings. To form the leading edge, the Rudder skins are rolled toward each other and riveted together.
The skins were rolled around a one inch diameter iron pipe as shown in the photo. The pipe is held on top of the skin but close to the table by two J bolts. Duct tape is stuck to the outside of the skin and brought up over the pipe. (We ran out of grey duct tape and switched to red.) Then, the pipe was rotated by the vise grip pliers, pulling the skin forward and up around the pipe.
The result is a curved skin, in this case the Rudder left side skin.
The right skin is being taped to the 1″ pipe. It will overlap the left skin when rolled and riveted.
After rolling, the two skins do not yet overlap. We could not bring them together and hold them in place with one hand while trying to insert a cleco with the other hand. Duct tape was again part of the solution. Longer strips of tape are stuck to the right side skin and pulled upward and onto the left skin. Four strips were alternately adjusted until silver clecos slid easily into the overlapping holes.
Rudder leading edges have factory punched holes slightly smaller than a #40 drill. The plans call for them to receive AD-41-ABS pop rivets that require a #30 size hole.
One at a time we up-sized the holes replacing the silver clecos with copper.
Clecos were then removed and the holes deburred.
Notice the gap remaining between the skins.
12/24/14
Skin edges were masked and prime painted before reapplying the clecos in preparation for pop riveting. Here Dolly is showing how it’s done.
The completed Rudder, minus end caps. We like it. The push rod end bearings used for the Rudder hinges have been inserted but not yet adjusted to final distance from the Rudder spar.